

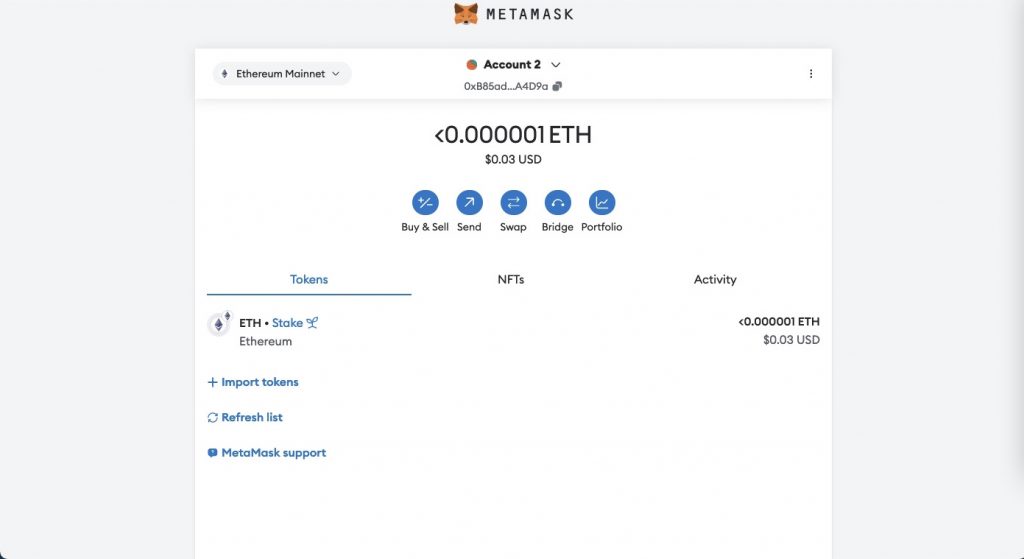
Sei Network is a high-performance Layer 1 blockchain designed for exceptional speed and efficiency. Its latest update, Sei V2, introduces parallelized EVM execution, significantly optimizing transaction processing. The network uses Delegated Proof of Stake to deliver fast, low-cost operations. Supporting both EVM and CosmWasm environments, Sei allows smooth integration and broad access to the Cosmos ecosystem. So, how can you add Sei Network? In this guide, we’ll walk through step-by-step instructions to add Sei to MetaMask manually, automatically, and more. Let’s dive in.
How to Add sei to Metamask Manually
You can add Sei to Metamask Manually through RPC. To add Sei RPC to MetaMask, follow these steps:
- 1. Open your MetaMask extension or app.
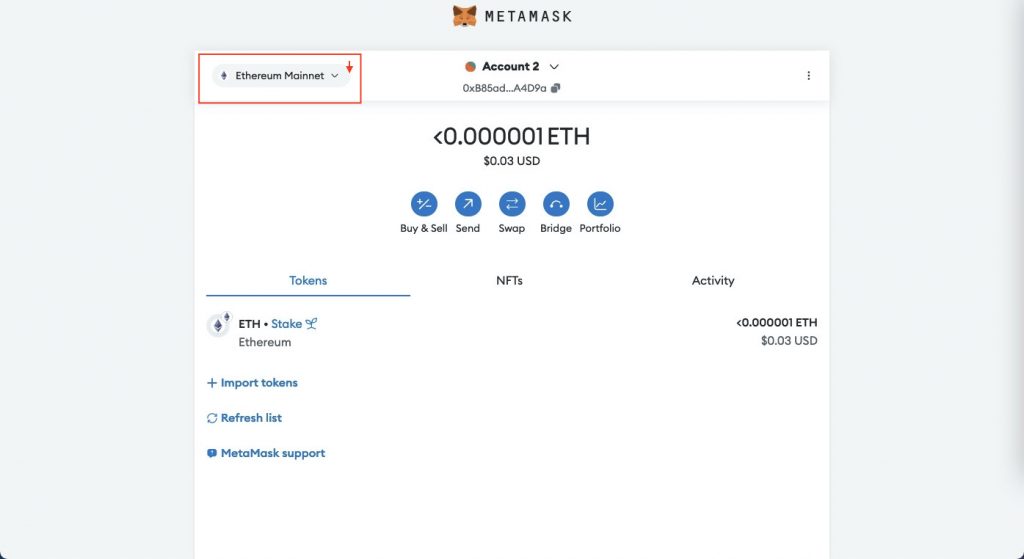
- 2. Click on the network dropdown at the left corner of the MetaMask interface.
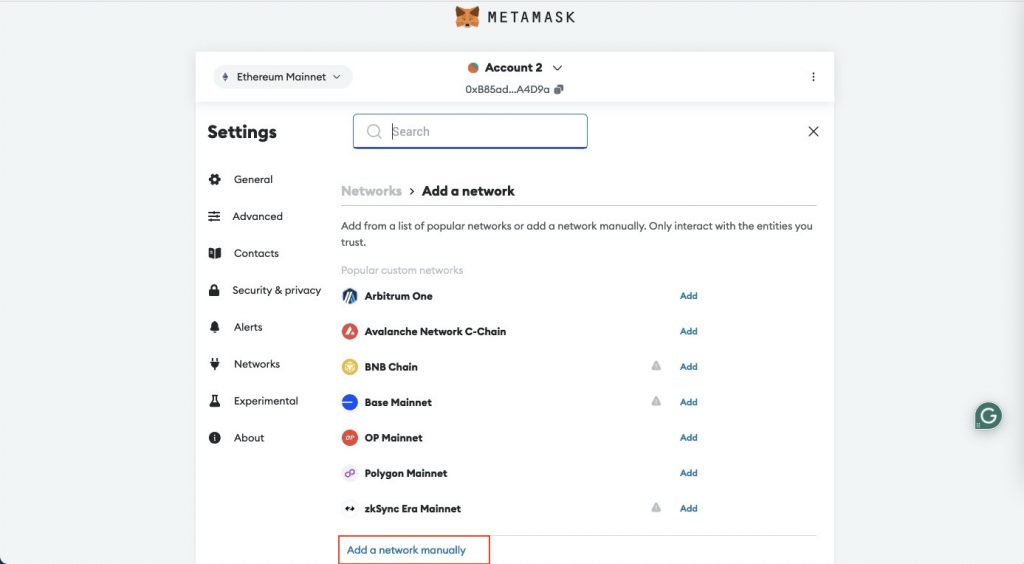
- 3. Navigate down and select “Add Network.”

- 4. Scroll down and select “Add a Network Manually.”
- 5. Enter the following details in the required boxes:
Network Name: Sei
Register for Tekedia Mini-MBA edition 19 (Feb 9 – May 2, 2026): big discounts for early bird.
Tekedia AI in Business Masterclass opens registrations.
Join Tekedia Capital Syndicate and co-invest in great global startups.
Register for Tekedia AI Lab: From Technical Design to Deployment (begins Nov 15th).
New RPC URL: https://evm-rpc.sei-apis.com
Chain ID: 1329
Currency Symbol: SEI

Block Explorer URL: https://seitrace.com
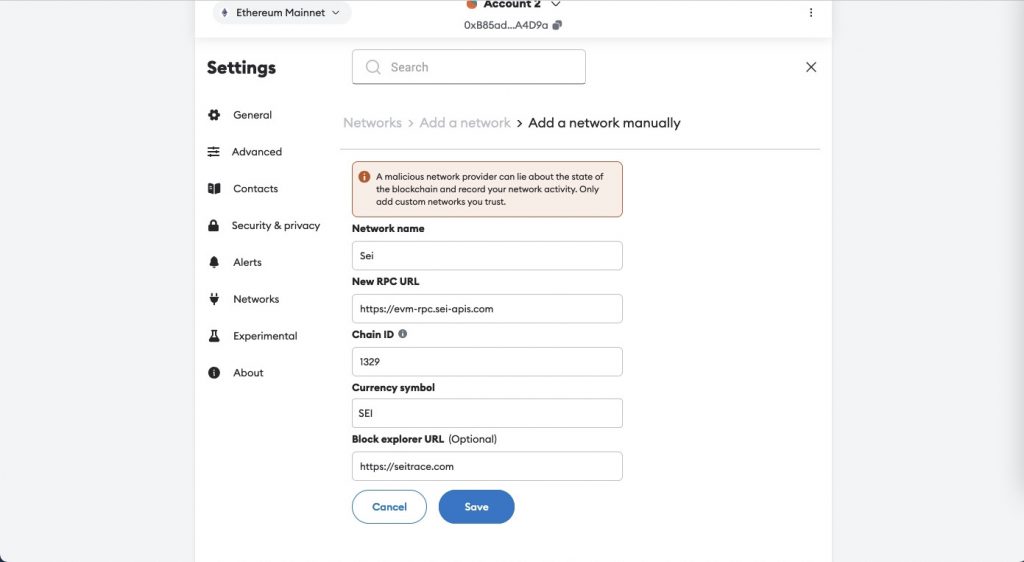
- 6. Click “Save” to add the Sei Network to your MetaMask.
You can now manage Sei assets in your Metamask.
How to Add Sei to Metamask Automatically
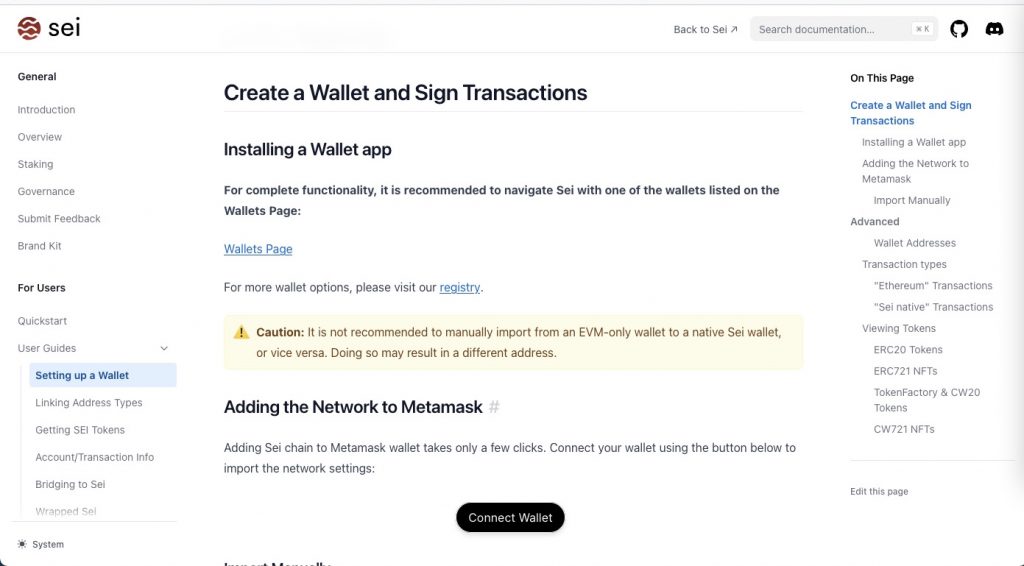
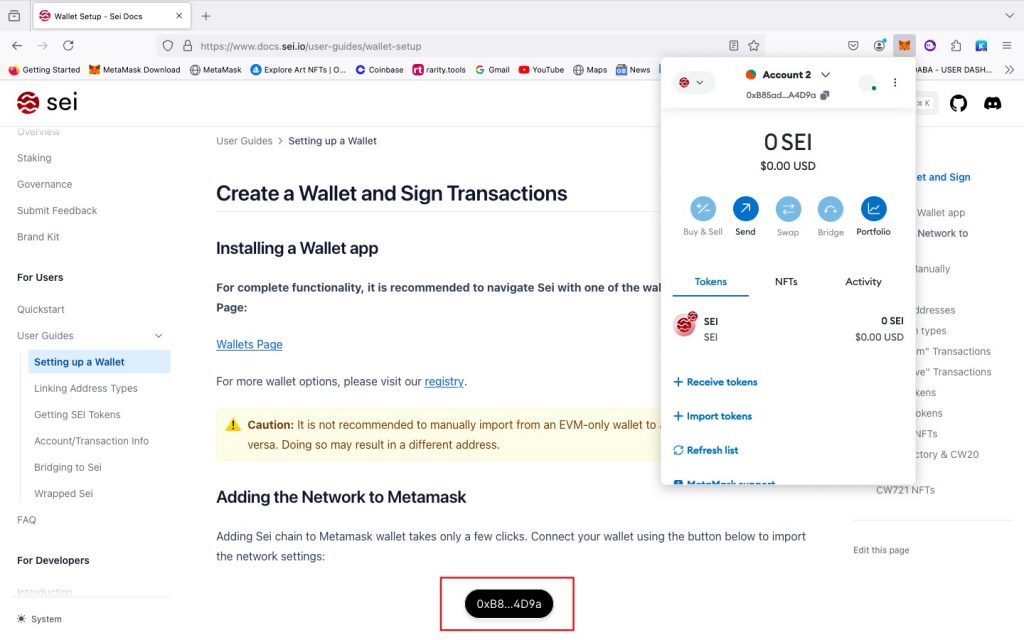
You can add the Sei network automatically from the Sei Docs or ChainList. To add the Sei network using Sei Docs, follow the steps below:

- 1. Visit the link: https://www.docs.sei.io/user-guides/wallet-setup
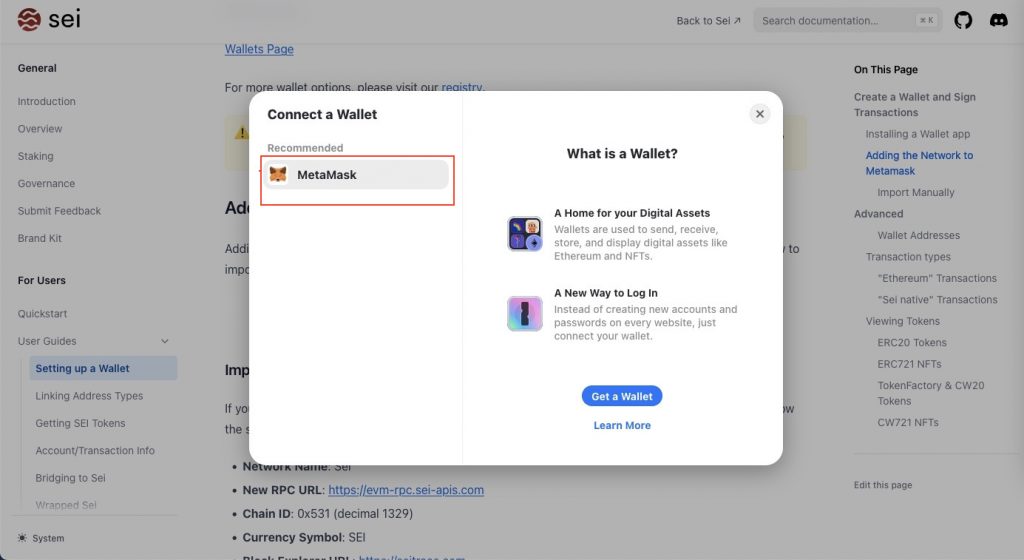
- 2. Navigate to “Adding the Network to Metamask.”
- 3. Click on “Connect Wallet.”
- 4. Select “Metamask.”
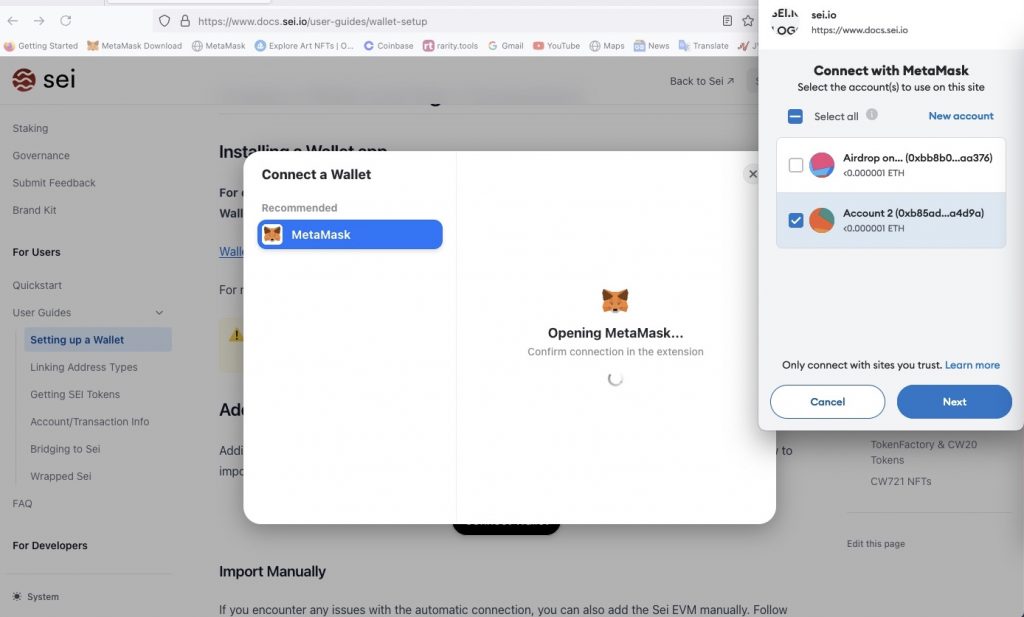
- 5. Select the account you want to connect to Sei and click “Next.”
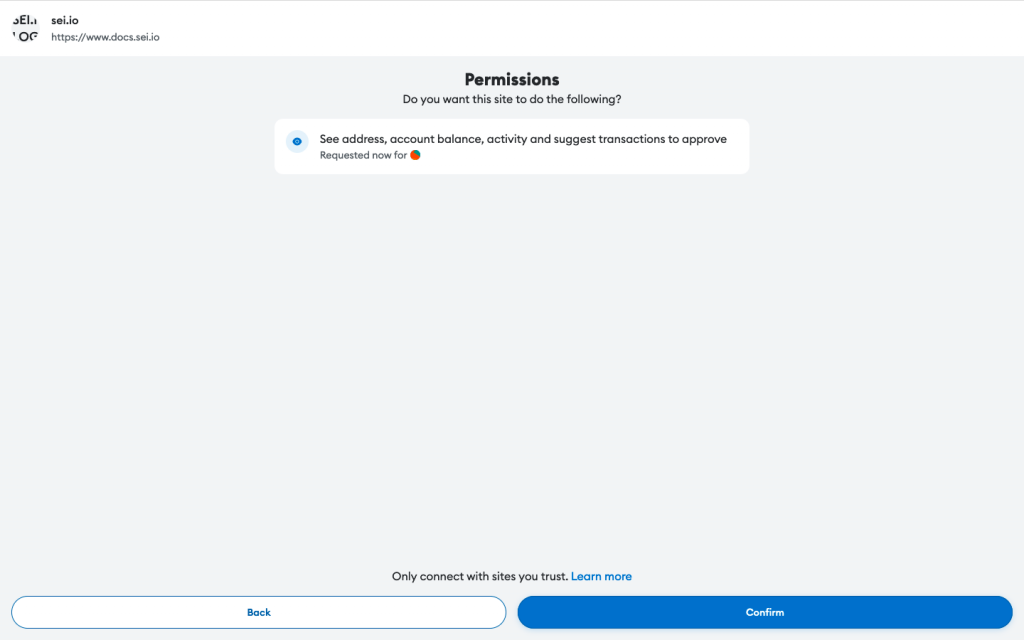
- 6. Click on “Confirm” to grant permission.
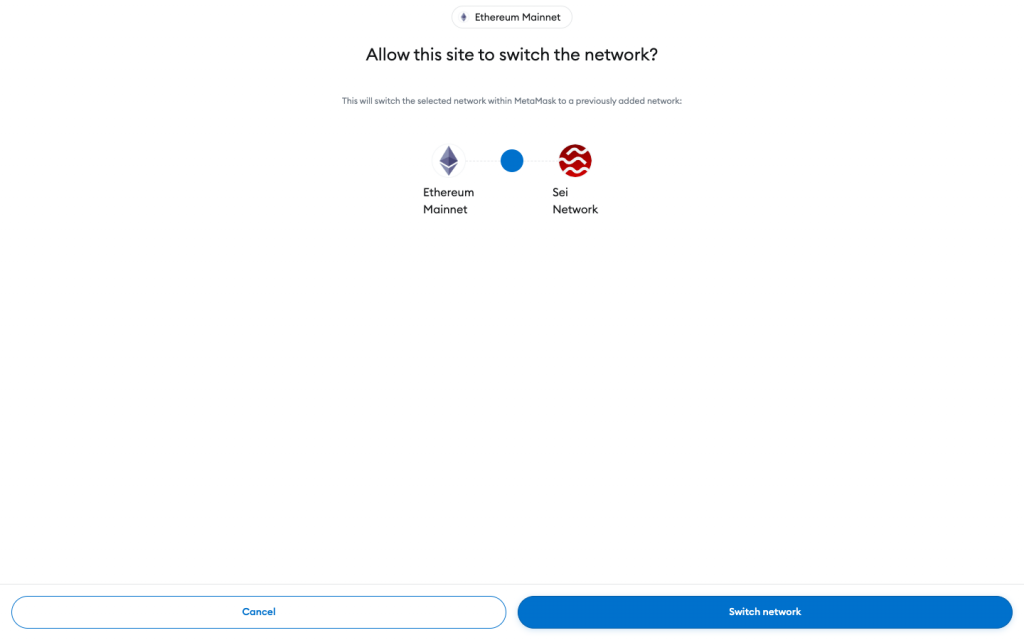
- 7. Select “Approve” to grant website permission.

- 8. Click on “Switch Network” to switch to Sei.
Your connected wallet address will appear on the Sei docs.
You can now manage Sei in your EVM-compatible wallet.
How to Add Sei to Metamask through ChainList
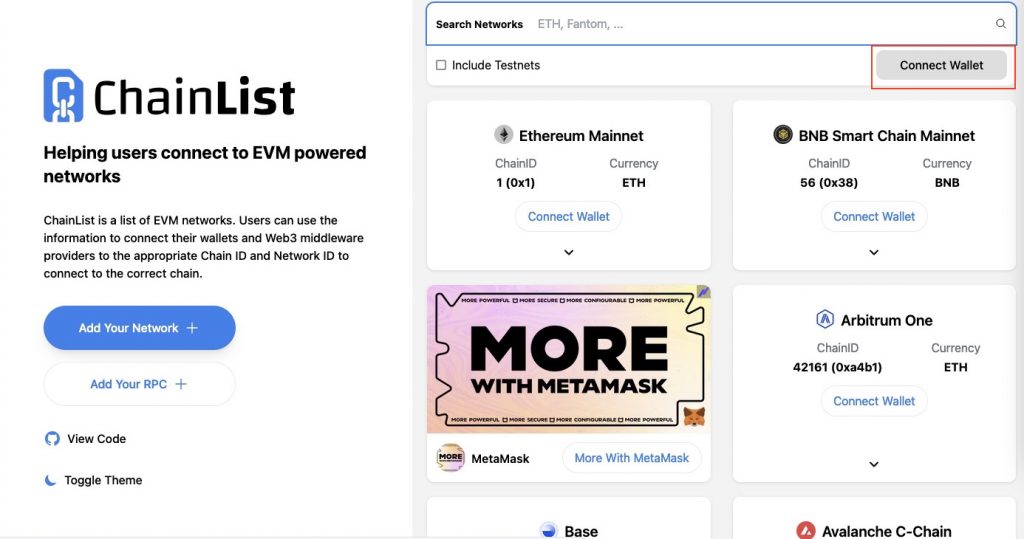
To add the Sei network to MetaMask using Chainlist, follow these steps:
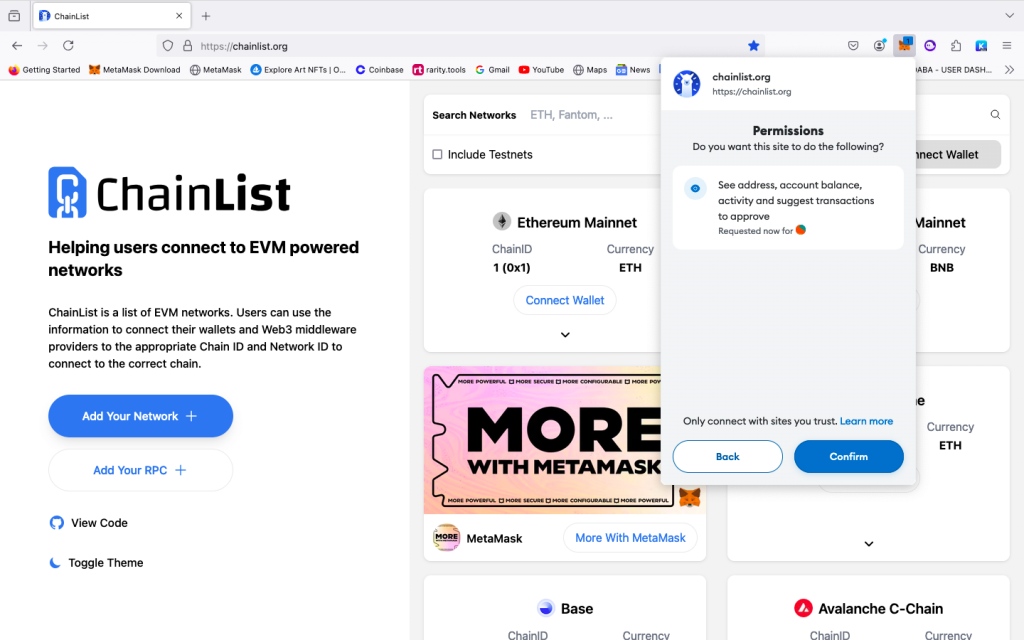
- 1. Visit ChainList website: https://chainlist.org/
- 2. Click on “Connect Wallet” at the top right corner.
- 3. Select the account you intend to connect and click on “Next.”
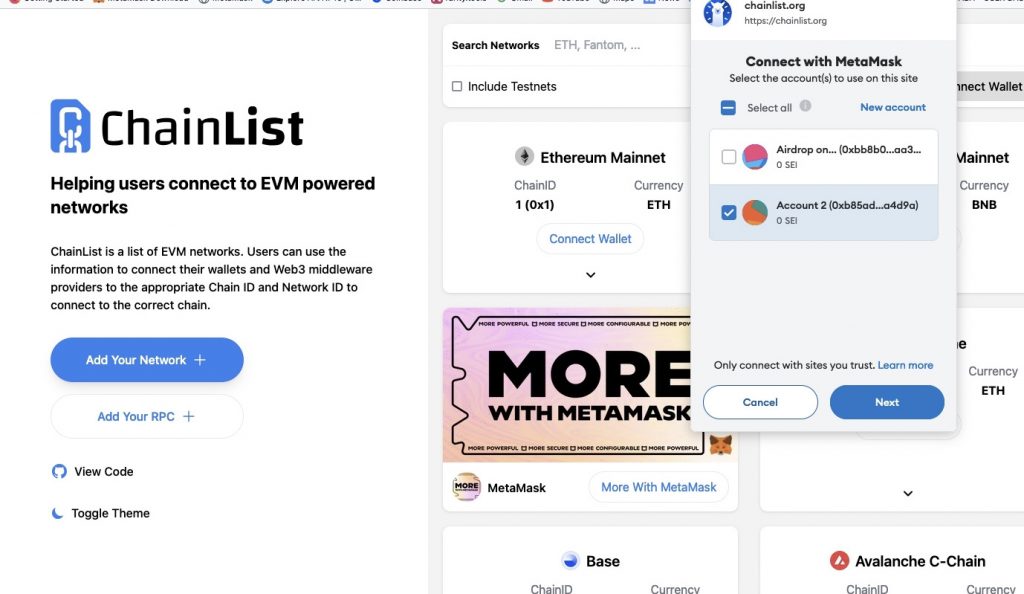
- 4. Select “Confirm” to grant permission.
Your connected wallet address will appear on ChainList.

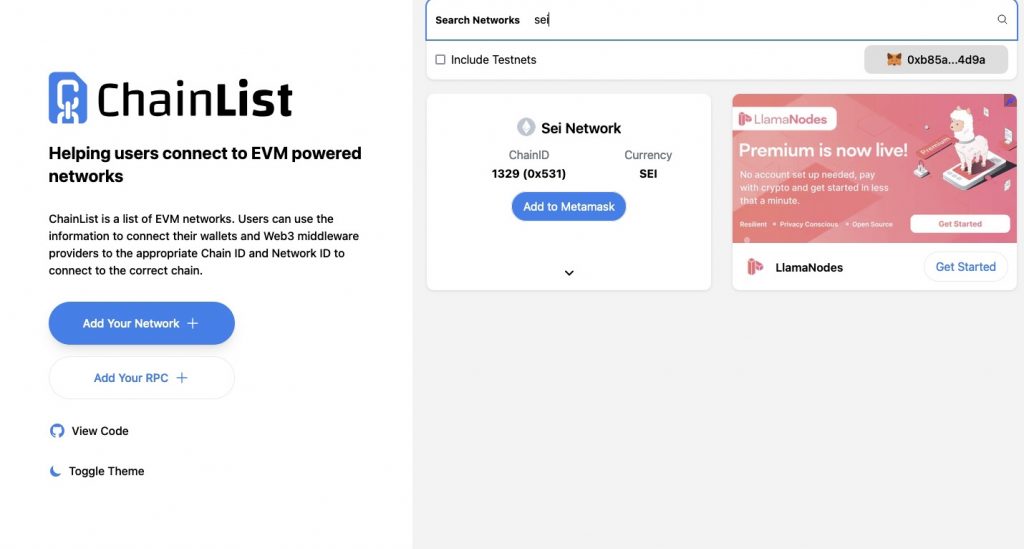
- 5. Search for “Sei” using the search bar at the top of the page..
- 6. Click on “Add to Metamask.”
You will see a grant permission pop-up
- 7. Select “Approve.”

- 8. Select “Switch Network.”

Now, you’ve successfully added Sei with ChainList and can manage Sei in your EVM-compatible wallet.
How to Connect Sei to EVM Addresses Using Metamask
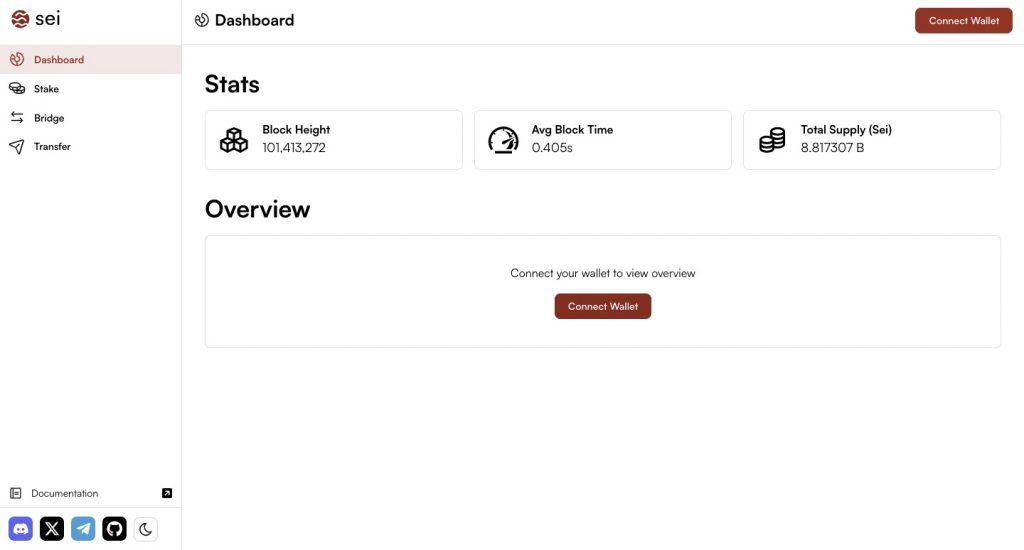
- 1. Visit https://app.sei.io/
- 2. Select “Connect Wallet” on the dashboard to view and manage your account.
- 3. Complete the captcha that pops up on your screen.
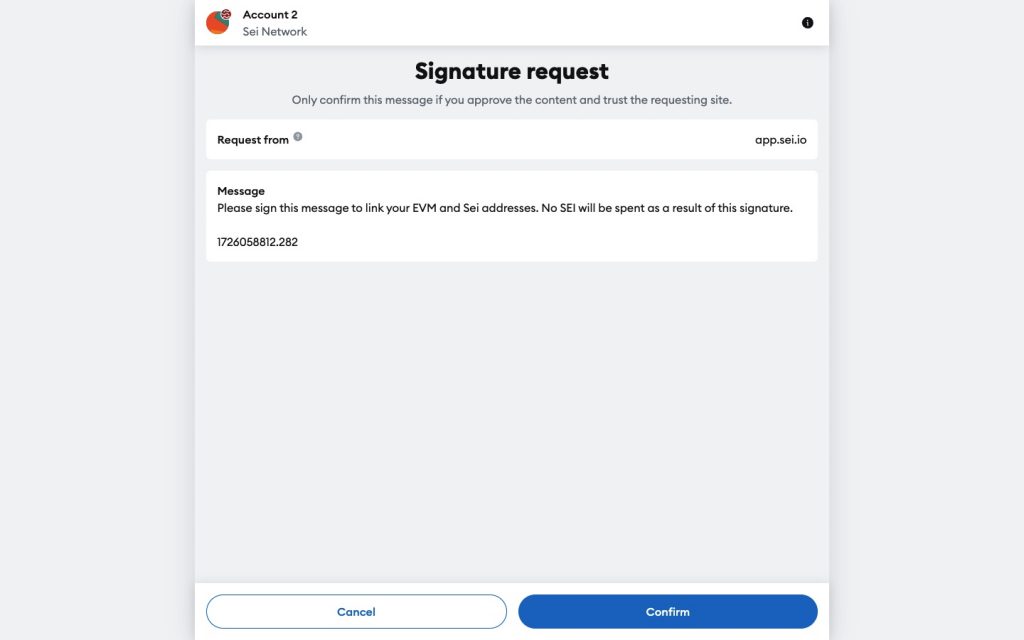
- 4. Select “Link Addresses” to connect your account on-chain.
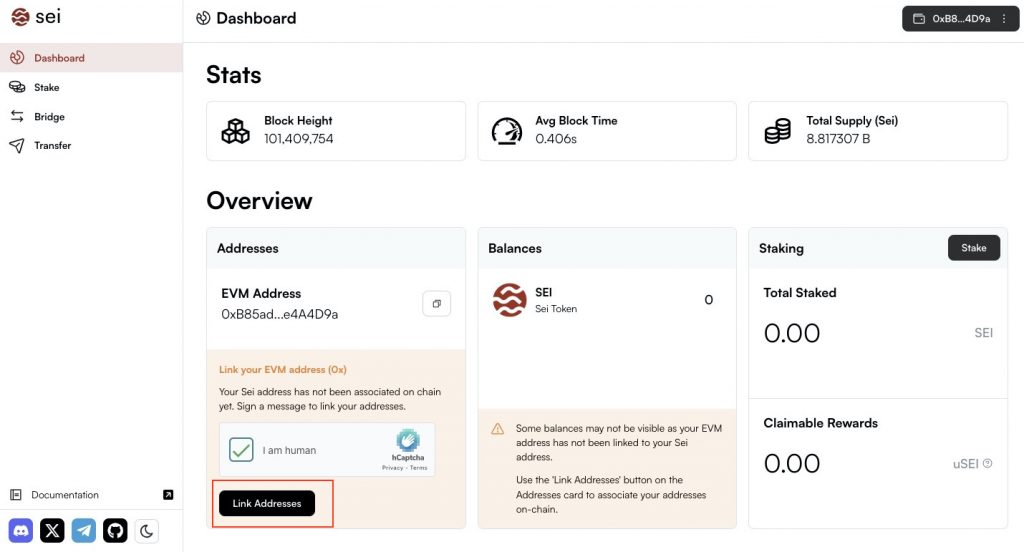
A signature request will pop up on your screen
- 5. Click on “Confirm.”
Once your wallet is connected, you will see a Sei wallet address below your Metamask address.
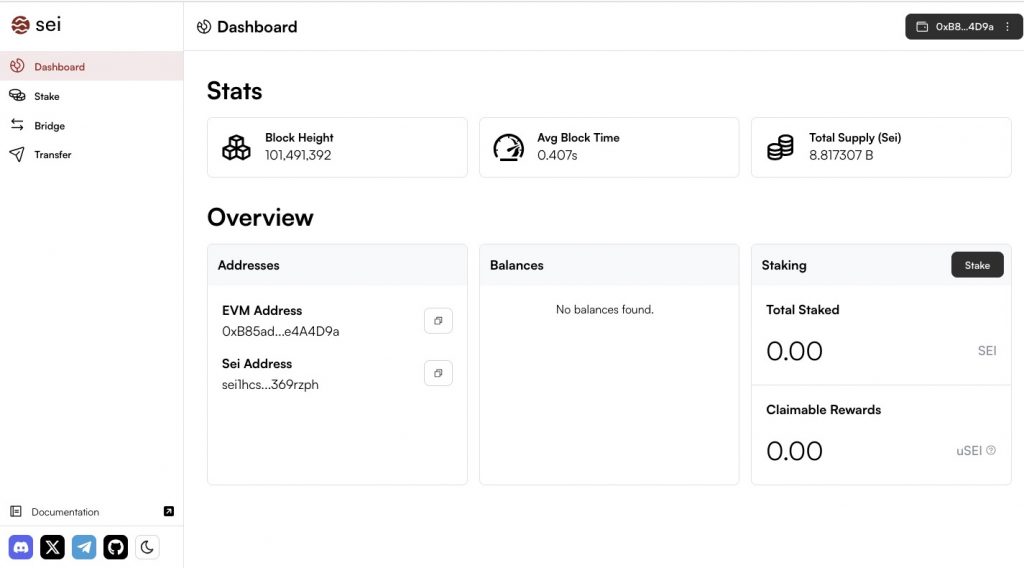
You can now use your wallet on decentralized platforms built on the Sei network.
How to Connect to Sei dApps Using Metamask
Once you’ve successfully connected your wallet to the Sei dashboard, you can access several DEX platforms on the Sei ecosystem. Let’s use DragonSwap as an example.
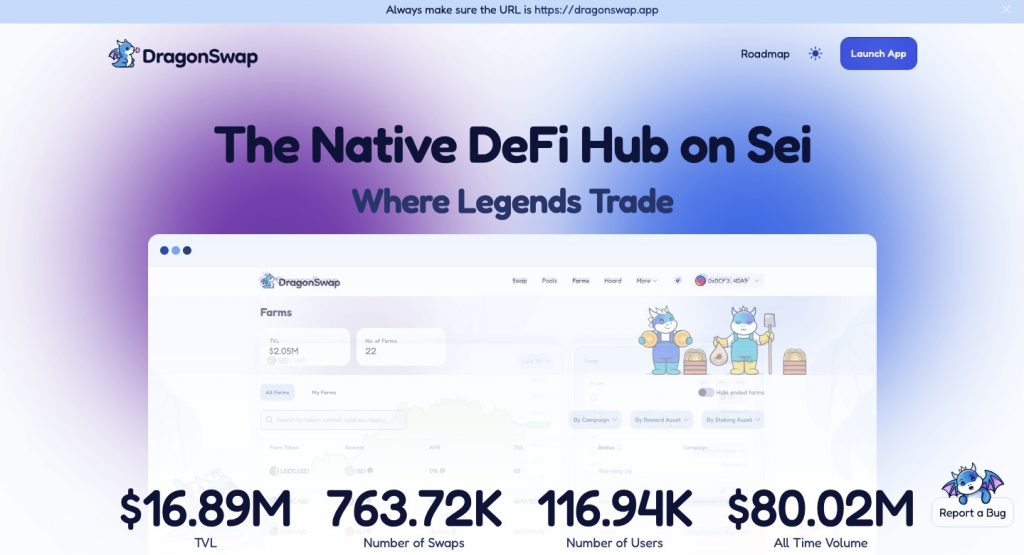
DragonSwap is a DeFi platform on the Sei Network, featuring an Automated Market Maker and a prediction market. It also offers liquid staking support. Users can stake, contribute to liquidity pools, and participate in yield farming within the Sei ecosystem. To connect Sei to DragonSwap using MetaMask, follow these steps:
- 1. Visit https://dragonswap.app/
A pop-up will appear.
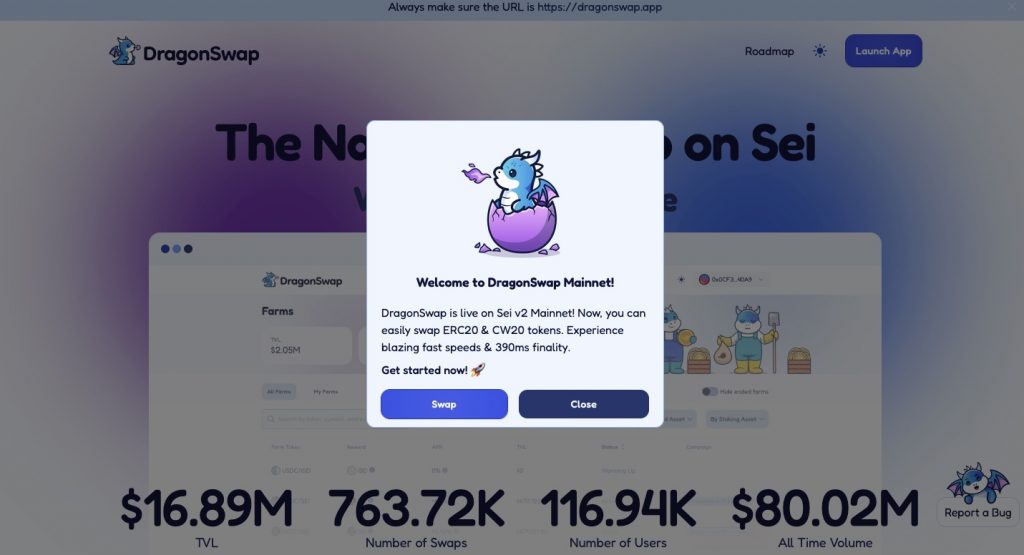
- 2. Select “close” if you want to carry out other activities beyond swapping.
- 3. Click on “Launch App” at the top right corner of the page.
- 4. Select “Connect Wallet” at the top right corner.
A pop-up will display
- 5. Select “Metamask.”
- 6. Click on the wallet address you want to connect and click on “Next.”
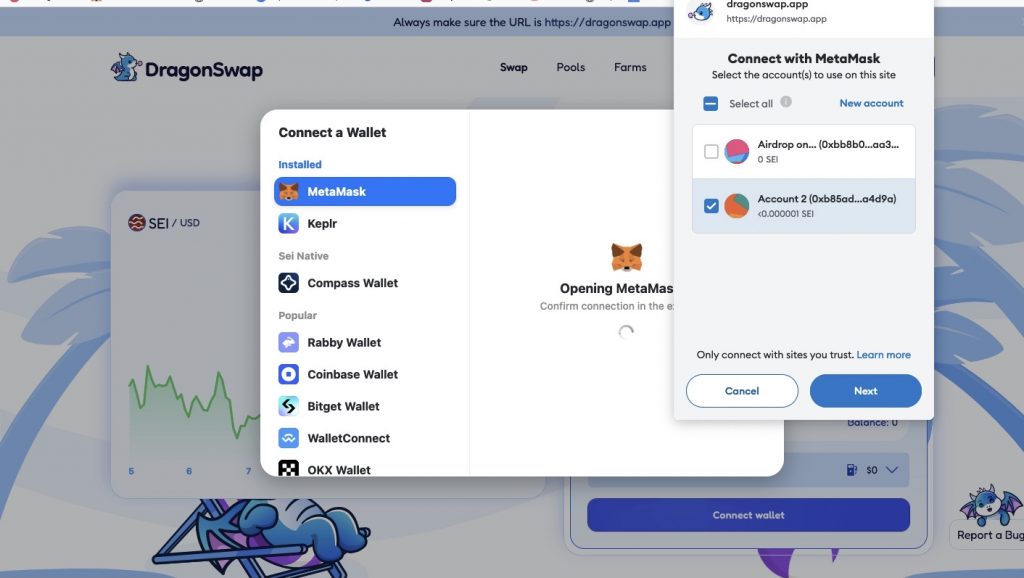
A grant permission request will pop up
- 7. Click on “confirm.”
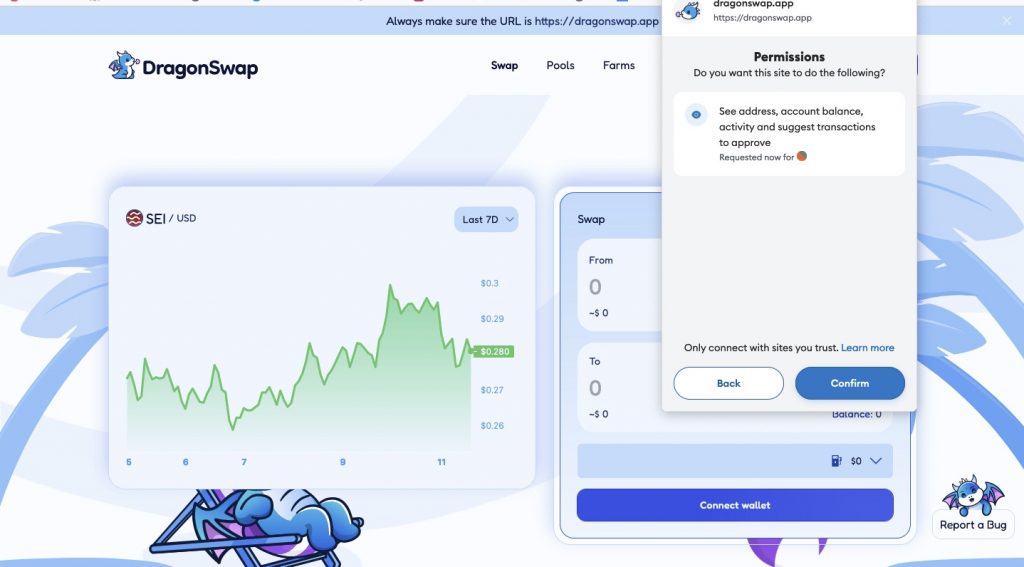
You can now swap tokens, provide liquidity into pools, and participate in yield farming.
FAQs
Can I Connect Metamask to Sei dApps Directly?
Sei dApps require you to link your Metamask to the Sei dashboard to explore a variety of DeFi products and services. This will help you generate a Sei Native address alongside your EVM address for a smooth interaction.
What is the Difference Between the Sei Native Wallet and the EVM Wallet?
On the Sei Network, linking your EVM wallet (0x address) generates a native Sei address (Sei1). Both addresses are connected and represent the same account. The Sei address is used for native Sei dApps, while the EVM address is used for EVM-compatible dApps. Balances and transactions are synced between the two, so you can send and receive funds using either address.
Does Sei Have a Native Wallet?
Yes. While you can access Sei’s native wallet using MetaMask, Sei also has its own native wallet called Compass. Compass facilitates fund transfers, NFT exploration, and connections across dApps on the Sei network.
Can I Bridge to Sei?
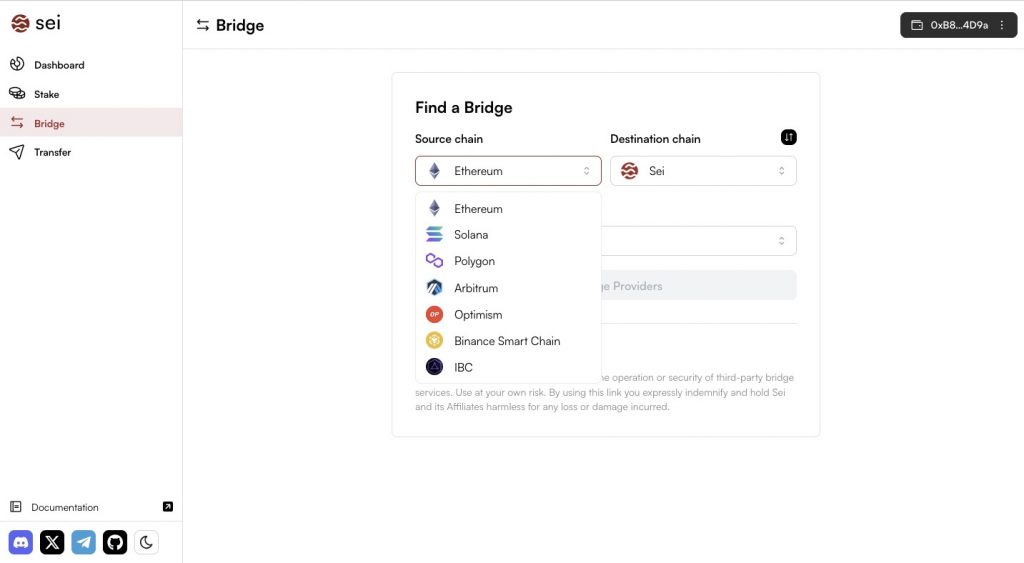
Yes, you can bridge to the Sei network. Although EVM-compatible wallets like MetaMask don’t support this feature, you can use cross-chain platforms like LiFi Protocol or Stargate Finance. Alternatively, you can use the Sei website, which works with Layer 1 and Layer 2 solutions such as Ethereum, Solana, Polygon, Arbitrum, Optimism, Binance Smart Chain, and IBC (Inter-Blockchain Communication). The website supports token assets like ETH, WBTC (Wrapped BTC), USDC, and USDT. Here’s how to bridge on the Sei’s website:
- 1. Go to https://app.sei.io/bridge
- 2. Select “Source Chain.”
- 3. Click on “Select Token.”
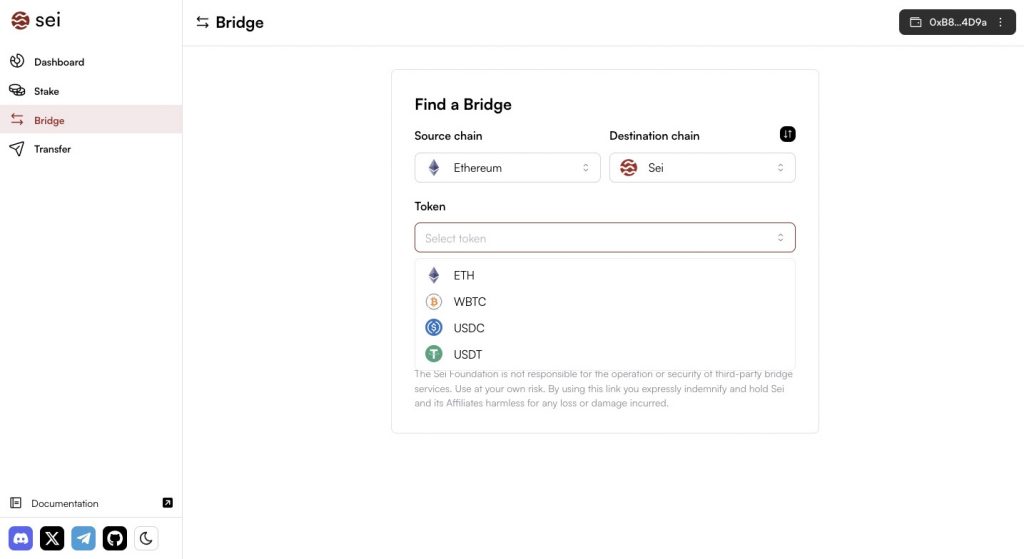
- 4. Choose your preferred token and select “Find Bridge Providers.”
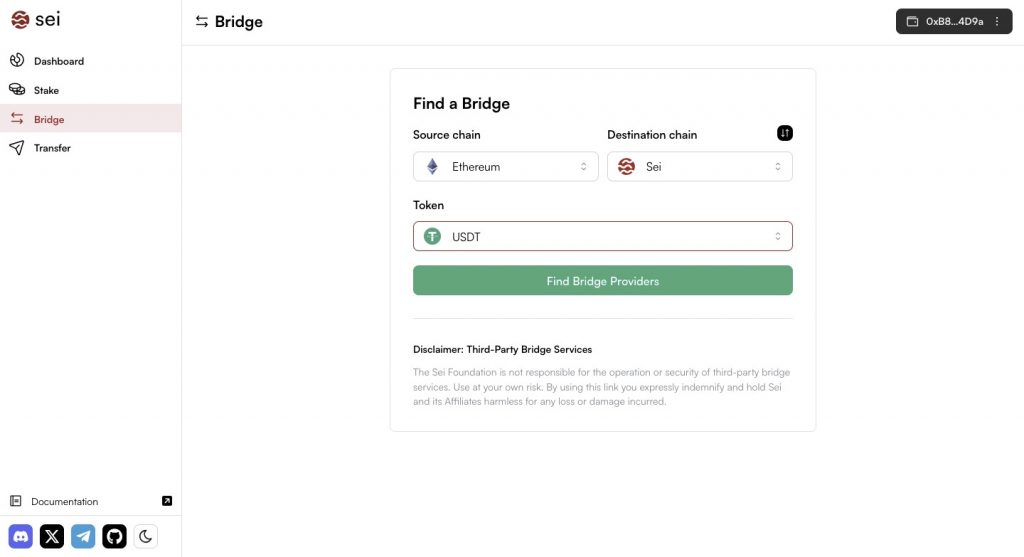
- 5. Choose a preferred third-party bridge service from the available options, such as Squid, Symbiosis, Skip, Stargate, or TFM. The choice of bridge service depends on your source chain.
- 6. Connect your wallet and bridge.
Final Thoughts
Adding the Sei Network to MetaMask is a straightforward process, whether done manually, automatically through Sei Docs, or using ChainList. Sei’s high-performance capabilities and integration with both EVM and CosmWasm environments make it efficient and flexible.
Following the provided steps allows you to properly manage your Sei assets and explore various decentralized applications on the Sei network. That way, you can fully tap into the benefits of Sei’s advanced features and extensive ecosystem.
Disclaimer!: This article is solely for educational purposes and should not be interpreted as a form of financial advice (NFA). Always conduct personal research before investing in any blockchain project.