

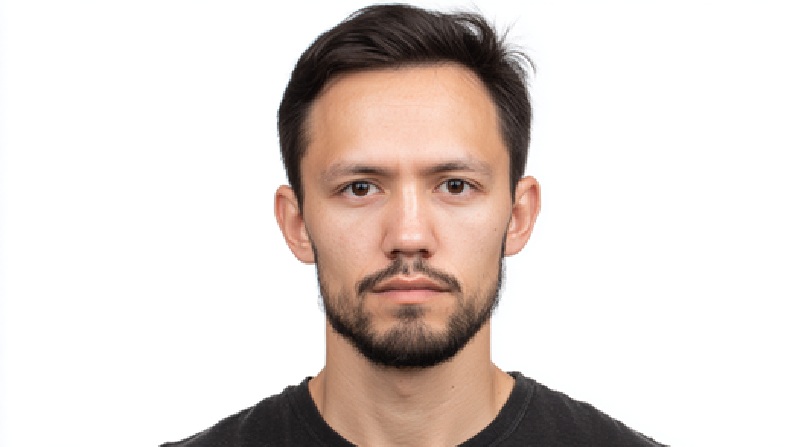
A slightly dark background, uneven lighting, or a blurry image is enough to have the passport application rejected. Visiting the studios was traditionally the best method, but it is no longer convenient or feasible.
That’s where modern AI tools come in. The AI Background Remover tool for ID and Passport Photos makes the process easy by automatically detecting the subject, clearing out distractions, and replacing the background as per your needs.
With just a few clicks, you can create photos that follow official rules and are ready for submission. The article breaks down the essential requirements for passport photos and explains how to use an AI background remover step by step.
Official Requirements for Passport Photos
Passport photo approval has particular guidelines that must be followed. From frame setting to expressions, everything has to be perfect. Here are a few things that usually matter the most.
- Size and Dimensions: The standard passport photo size is usually 2×2 (51×51 mm). The picture may have to meet the specific pixel count, depending on the authorities.
- Photo Recency: The passport photo must be taken within the last six months so that it is able to reflect the applicant’s current appearance.
- Image Background: A clean and light colored background is a necessity for a passport photo. Typically, white and off-white work the best and are common among the applicants. Avoid shadows or textured walls.
- Head and Framing: The head of the applicant should be at the center. Also, the face should cover 70-80% of the photo, and the shoulders must be visible.
- Expressions: A neutral expression works best for passport photos. Open eyes, closed mouth, no exaggerated smiles or pouts, tidy hair are the simple requirements.
- Glasses and Coverings: As long as the doctor prescribes the glasses, you can use them, but ensure that the eyes are clearly visible and there is no glare on the eyes. Head coverings, but the full face must be clearly visible.
Though the list is picky, these rules exist to keep the passport photos consistent. Even a small glare or background is enough to hold up the application.
Using an AI Background Remover for Passport Photos
Getting a passport photo is not stressful anymore. Rather than worrying about getting the right background, frame, light, or rushing to the studio, you can simply take a picture at home and fix it with X Design’s AI photo editor.
It clears out the dark backgrounds and replaces them with the background of your choice as needed for the documents. The tool automatically detects the subject and makes changes to deliver a passport-ready picture. It also helps fix the lighting, resolution, edges, and more. Here is how the tool works:
1. Upload the Picture
Open the AI background remover tool and upload the passport-size photo you want to make changes to. Ensure you upload a bright and clear picture. Avoid blurry images, heavy shadow images as they can make the photo look less sharp.
2. Let the AI Clean it Up
In just a moment, the background will be cleared from the photo. The tool spots the subject on its own and keeps it in focus while everything else is removed. This way, there’s no need to spend time erasing edges or fixing details by hand.

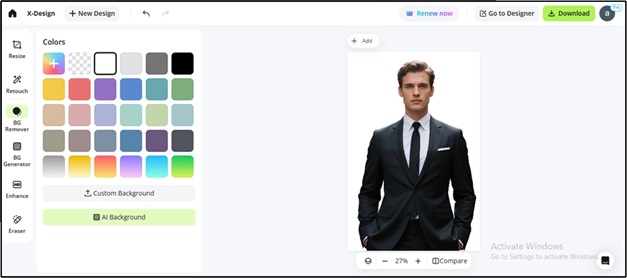
3. Pick Plain Backdrop and Check for Framing
The tool automatically removes the background from your photo. On the left-hand side, there are custom background options to choose from. For the passport, you can choose a lighter color background, preferably white. Check if the photo is framed well and aligned at the center.
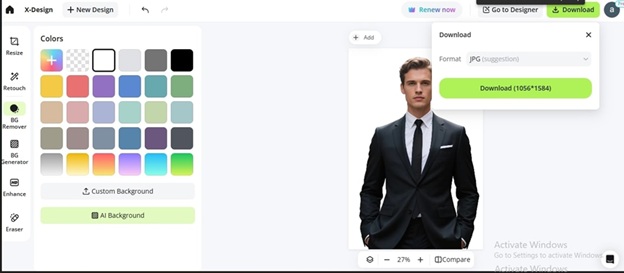
4. Save and Use It
Just save the photo when it looks good. You can download the image in JPG format or print it.
How AI Can Help with Other ID Photos
Background remover tools aren’t only for passports. The same process works for almost any type of ID that needs a clean, enhanced, background-free, and simple photo. Instead of taking new pictures for each document, one shot can be reused and adjusted.
| Use Case | How it Helps |
| Passport Photos | Creates a plain, compliant background that meets official standards |
| Visa Applications | Adapts one clear photo to different country-specific requirements |
| Student IDs | Removes cluttered dorm/classroom backgrounds for a more professional appearance |
| Work Badges | Provides a consistent look across all employee ID cards |
| Driver’s Licenses | Delivers neat, well-framed photos ready for digital or print submission |
| Professional Profiles | Enhances LinkedIn or company bios with a clean, polished photo |
| Event Passes | Quickly prepares photos for conferences, expos, or other access badges |
| Membership Cards | Simplifies the process of creating gym, club, or library cards with clear photos |
Mistakes to Avoid in Passport Photos
Getting a passport photo is easy but small mistakes can get you rejected. Here are the common pitfalls to watch out for:
- Clothing that matches the background: Avoid busy patterns that are the same as the backdrop, your face will be less visible.
- Bad lighting: Shadows can distort your features and get the photo rejected. Natural light is the best.
- Incorrect cropping: Make sure your head is centered correctly. Too much empty space or too tight cropping around your face can be a problem.
- Wrong angles: Always take the photo straight on. Selfies or angled shots can make your face look distorted and may not meet the requirements.
Final Words
The X-Design AI background remover tool has replaced the traditional days when applicants used to book a studio appointment and spend a hefty amount for passport pictures. The tool makes even a photo taken at home professional, and that meets the official standards.
The results you get are quick and save both time and money. Meeting compliance when uploading passport images is important to avoid rejections and delays in formalities.
But with the right tool offered by X-Design, you can tweak even the slightest elements in your image and make them ideal for meeting compliance.